Comprehensive Consultation
Your journey begins with a strategic conversation, conducted either online or face-to-face. We assess your clinical goals and dental history to conclude with a preliminary treatment plan and a transparent price estimate.
From ancient rudimentary methods to the advanced techniques of today, the evolution of den...
Dentakay understands that a beautiful smile can significantly boost your confidence. If tr...
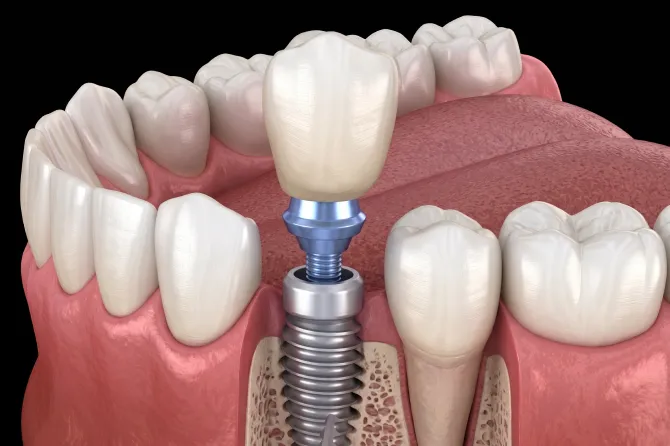
We all know how a missing teeth can be a source of stress. After all, how your smile appea...
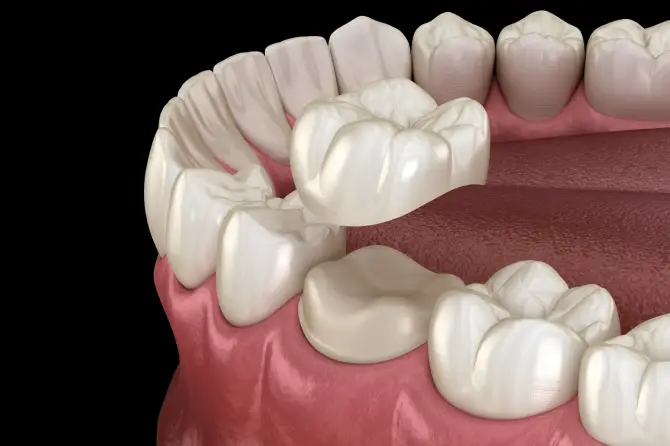
All thanks to advancements in dental crown technology, dental problems can now be taken ca...
First impressions have a lot to do with smile. And if you are not confident about it, you ...
Does your smile show more gums than you want it to? At Dentakay, we understand that a gumm...
Because your smile is your strongest asset, you need to make sure it’s perfect. Among the ...
Are your teeth crooked or misaligned? Orthodontics can help! This specialized branch of de...
Imagine a world where your child's dental visits are filled with laughter and positive exp...
Same-day dentistry represents a significant advancement in dental efficiency, utilising CA...
As one of the first features strangers notice about you, your smile can have a significant...
Are you struggling with gum problems? Gum health is often overlooked, but it plays a cruci...
Dentakay Seaside combines advanced dental care with a relaxing Mediterranean setting — ide...
Our flagship clinic in Istanbul offering full-service dental care in a luxurious and moder...
Dentakay’s consultation office in central London offers in-person Q&A sessions, treatm...
Dentakay’s Riyadh clinic offers modern dental care tailored to patient needs, combining te...
Located in central Istanbul, Dentakay Şişli is designed with French-speaking patients in m...
Dentakay Antalya combines advanced dental care with a relaxing Mediterranean setting — ide...
Located in Ankara’s upscale Çayyolu district, this Dentakay clinic offers modern, high-qua...
Dentakay Bağcılar delivers expert dental care in a modern, fully equipped facility on Ista...
Would you like to be a part of a dynamic team that is passionate about dental health, prioritizes patient satisfaction? In our clinic, you can have the opportunity to improve yourself and advance your career by working with professionals who are experts in their fields.
JCI-Accredited Dental Care
JCI (Joint Commission International) accreditation is a globally recognized certification that ensures healthcare organizations meet rigorous international standards for patient safety, quality of care, and operational excellence. JCI accreditation is exceptionally rare among dental clinics. Dentakay’s systems for patient safety, infection prevention and consistent care have been independently assessed against international healthcare standards.
An apicoectomy is a surgical dental procedure performed to remove infections or cysts that develop a...
Reach out for address details, visit planning, or any questions about your treatment.
Explore How to Reach UsSelect your treatment to view specific protocols, travel arrangements, and dedicated aftercare guidelines.
From your first conversation to stepping into the clinic — every milestone of your Dentakay experience, curated for you.
Your journey begins with a strategic conversation, conducted either online or face-to-face. We assess your clinical goals and dental history to conclude with a preliminary treatment plan and a transparent price estimate.
Once your treatment date is confirmed, our coordination team handles the complexities. We assist with itineraries, secure your stay in a premium hotel, and organize all private VIP transfers. We manage the logistics so you can focus on your health.
Upon landing, you are greeted at the airport by our dedicated representatives and seamlessly transferred to your accommodation via luxury vehicle. This is your time to rest and settle in before your clinical visit the following day.
At the clinic, full diagnostics are performed. Our specialists conduct a close, comprehensive examination to confirm, add, or adjust your preliminary treatment plan. This ensures the procedure is tailored to your exact biological needs.
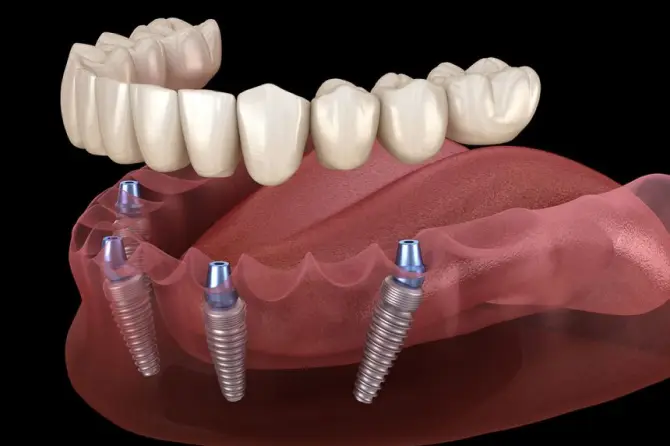
Evaluating your suitability for All-on-4/6
X-rays and CBCT scans are taken to assess bone density, sinus position, and nerve pathways.
This allows us to plan the implant positions and reduce the risk of complications.
3D planning is used to design the ideal placement of the four or six implants, helping create stable support for the new teeth.
Placing the foundation of your new smile
Four or six dental implants are placed into the jawbone under local anaesthesia.
The implants create a stable base for a full-arch prosthesis.
The process usually takes a few hours. The front implants are placed vertically, while the back implants may be angled by 30–45°.
Restoring your smile immediately
A fixed temporary bridge may be attached to the implants on the same day as the surgery.
This allows patients to leave the clinic with fixed temporary teeth.
This restores the appearance of your smile and supports speech while the implants heal.
Supporting function during recovery
A temporary bridge is worn while the titanium implants gradually fuse with the jawbone.
This gives the implants time to bond securely while the temporary teeth remain in place.
Healing typically takes three to six months, depending on individual health and bone quality.
Delivering your final smile
The temporary bridge is replaced with a custom-made permanent prosthesis.
This final restoration is designed for durability, function, and aesthetics**.**
The prosthesis may be made from acrylic, porcelain**,** or zirconia and can last for years with proper maintenance and care.
What to expect after treatment.
Some discomfort and tenderness around the gums are normal for the first few days after surgery.
Take your pain medication exactly as prescribed. Severe or worsening pain is not normal, so contact your doctor immediately if you are concerned.
Apply an ice pack wrapped in a cloth to the outside of the face where you’re experiencing swelling. Avoid placing ice directly on the gums or surgical area.
Follow the soft-food diet recommended by your doctor during the early healing period. Suitable foods include yoghurt, mashed potatoes, cooked vegetables, scrambled eggs, smoothies, and similar soft options.
Avoid hard, crunchy, or chewy foods during the early healing phase, as they can place pressure on the implants and interfere with recovery.
Do not brush the surgical area until your dentist says it is safe. Once approved, brush gently twice a day and follow their advice on flossing.
Use the antibacterial mouthwash recommended by your surgeon to support healing and reduce bacteria.
Most patients are able to return to work or school within 1–2 days after the procedure, depending on how they feel.
Physical activity should be kept light for the first few days, and strenuous exercise or heavy lifting should be avoided for at least 48 hours.
From your first conversation to stepping into the clinic — every milestone of your Dentakay experience, curated for you.
Your journey begins with a strategic conversation, conducted either online or face-to-face. We assess your clinical goals and dental history to conclude with a preliminary treatment plan and a transparent price estimate.
Once your treatment date is confirmed, our coordination team handles the complexities. We assist with itineraries, secure your stay in a premium hotel, and organize all private VIP transfers. We manage the logistics so you can focus on your health.
Upon landing, you are greeted at the airport by our dedicated representatives and seamlessly transferred to your accommodation via luxury vehicle. This is your time to rest and settle in before your clinical visit the following day.
At the clinic, full diagnostics are performed. Our specialists conduct a close, comprehensive examination to confirm, add, or adjust your preliminary treatment plan. This ensures the procedure is tailored to your exact biological needs.
Determining if you need a bone graft
Your dentist uses 3D CBCT imaging to evaluate your jawbone density.
It allows us to determine whether bone grafting is necessary.
Your dentist will assess the amount of available bone density and gum health to ensure a successful implant procedure.
Preparing for bone regeneration
Your dentist prepares the surgical area with local anesthesia
It allows your doctor to carefully place the graft material to support bone regeneration.
Depending on your case, your dentist can choose different graft materials, including synthetic grafts or bone taken from your own body.
Rebuilding your jawbone
The dentist carefully places bone graft material in the target area.
The graft acts as a scaffold, allowing your body to gradually develop new bone.
The procedure typically takes between 45 minutes to a few hours. We put a protective membrane over the graft to support healing.
Allowing your new bone to develop
Your body replaces the graft material with strong bone tissue.
This healing creates the stable foundation for successful dental implants
Healing time varies between 3 to 6 months before the bone is ready to support your dental implants.
What to expect after treatment.
Wait until the numbness completely wears off before eating. Otherwise, you may accidentally bite your lips, cheeks, or tongue.
For the first few days after your bone graft, eat soft foods such as yogurt, soups, mashed vegetables, and smoothies. This reduces pressure from chewing on the surgical area and disturb healing.
Avoid very hot foods and drinks immediately after surgery. Heat can increase swelling and discomfort around the surgical area.
Try to chew on the opposite side of your mouth to avoid placing unnecessary pressure on the treated area.
Continue brushing your teeth as normal but be gentle around the surgical area to avoid irritating the healing tissues.
Do not press or poke the surgical site with either your tongue or fingers. This can interfere with the healing process and cause infections.
If prescribed, use your recommended mouth rinse to support healing.
Avoid smoking and alcohol consumption during the healing period. Both can reduce blood flow, delay bone regeneration, and increase the risk of complications.
Mild swelling, bruising, and soreness are normal after a bone graft procedure. Follow your dentist’s instructions regarding pain relief and aftercare.
Avoid heavy exercise and strenuous activities during the first few days. Engaging in high demand activities increases blood pressure and the risk of bleeding and swelling.
Contact your dentist immediately if you experience severe or worsening pain, persistent bleeding, and signs of infection.
From your first conversation to stepping into the clinic — every milestone of your Dentakay experience, curated for you.
Your journey begins with a strategic conversation, conducted either online or face-to-face. We assess your clinical goals and dental history to conclude with a preliminary treatment plan and a transparent price estimate.
Once your treatment date is confirmed, our coordination team handles the complexities. We assist with itineraries, secure your stay in a premium hotel, and organize all private VIP transfers. We manage the logistics so you can focus on your health.
Upon landing, you are greeted at the airport by our dedicated representatives and seamlessly transferred to your accommodation via luxury vehicle. This is your time to rest and settle in before your clinical visit the following day.
At the clinic, full diagnostics are performed. Our specialists conduct a close, comprehensive examination to confirm, add, or adjust your preliminary treatment plan. This ensures the procedure is tailored to your exact biological needs.
Creating your personalised treatment plan
We perform digital scans, X-rays, and a bite assessment.
These records allow your doctor to predict how your teeth will move
This step allows your doctor to plan your braces or alignment structure based on your smile goals, bite, and facial structure.
Beginning your smile transformation
Braces are bonded to your teeth, or your first Invisalign aligners are fitted.
The appliance begins moving your teeth into their planned positions.
The Invisalign or braces will strategically apply pressure to your teeth causing them to shift into ideal alignment.
Keeping treatment on track
You attend appointments every 4–12 weeks.
Your orthodontist checks progress & makes adjustments.
The wires or aligners are adjusted to keep your teeth moving into their planned positions.
Keeping your smile for life
You will be given retainers after active treatment finishes
It prevents your teeth from shifting back.
Teeth need time to fully stabilize in their new positions and retainers tend to hold the teeth in place during this period.
What to expect after treatment.
Hard foods such as nuts can damage the brackets or wires.
Never consume any foods or drinks while wearing your aligners. You may only drink water while wearing them, otherwise, remove them before all meals and snacks.
Food easily collects around braces, so make sure to regularly brush your teeth and prevent food from building up.
Use floss threaders, interdental brushes, or water flossers to efficiently clean between the braces.
Rinse and gently brush aligners every day using lukewarm water and a soft toothbrush to maintain good hygiene.
Your teeth may feel tender for a few days after adjustments or changing aligners.
Apply orthodontic wax to brackets causing irritation until your mouth adapts.
Consistent wear is essential to keep treatment progressing on schedule.
Regular reviews allow your orthodontist to monitor your progress and make the necessary adjustments to speed up your treatment.
This habit can damage braces and delay treatment.
Protect your braces and teeth when practicing contact sports.
Always keep your Invisalign aligners in their protective case when you’re not wearing them.
If a bracket comes loose or aligner cracks, contact your orthodontic team right away.
From your first conversation to stepping into the clinic — every milestone of your Dentakay experience, curated for you.
Your journey begins with a strategic conversation, conducted either online or face-to-face. We assess your clinical goals and dental history to conclude with a preliminary treatment plan and a transparent price estimate.
Once your treatment date is confirmed, our coordination team handles the complexities. We assist with itineraries, secure your stay in a premium hotel, and organize all private VIP transfers. We manage the logistics so you can focus on your health.
Upon landing, you are greeted at the airport by our dedicated representatives and seamlessly transferred to your accommodation via luxury vehicle. This is your time to rest and settle in before your clinical visit the following day.
At the clinic, full diagnostics are performed. Our specialists conduct a close, comprehensive examination to confirm, add, or adjust your preliminary treatment plan. This ensures the procedure is tailored to your exact biological needs.
Planning a crown that fits perfectly
Digital scans and a clinical examination assess your oral health.
It allows us to determine whether crown treatment is suitable for you.
Your dentist will evaluate your gum health, bite, and tooth structure to see whether crowns are the right treatment for you.
Creating space for your custom crown
We gently reshape the tooth under local anaesthesia.
Proper preparation allows the crown to fit securely.
This creates room and provides support for the dental crown while preserving as much healthy tooth structure as possible.
Capturing precise measurements
A digital scan or dental impression records your smile parameters.
These measurements allow your custom crown to fit comfortably.
To ensure a precise fit and natural bite, we design the crown to match the exact shape of your tooth.
Preparing for the permanent crown
We place a temporary crown over the tooth.
It protects the tooth and reduces sensitivity during the healing period.
This step isn’t always necessary; some crowns can be manufactured within a day depending on the material.
Completing your new smile
We cement the permanent custom-made crown into place.
The crown restores your tooth's appearance and chewing function.
Your dentist will make any necessary adjustments before securely bonding the crown into place for a comfortable fit.
What to expect after treatment.
If local anaesthesia is still active, wait until the numbness wears off before eating. Otherwise, you may accidentally bite your lips, cheeks, or tongue.
For the first 24 hours, avoid chewing gum, caramel, toffee, or other sticky foods. These can loosen and displace the crown.
Avoid biting directly into very hard foods such as ice, hard sweets, or nuts, especially during the first day. Give time for the crown to fully settle into its place.
Continue brushing twice daily using a soft-bristled toothbrush. But be gentler around the gumline of the new crown.
Floss daily, sliding the floss gently between the teeth.
Good oral hygiene helps prevent decay around the crown and supports long-term success.
Avoid biting your fingernails, chewing gums or opening packages with your teeth. This could potentially dislocate or damage your crown.
Your bite may feel slightly different initially, but this usually settles within a few days.
If your bite feels uneven, discomfort persists, the crown feels loose, contact your dentist so we can make any necessary adjustments.
From your first conversation to stepping into the clinic — every milestone of your Dentakay experience, curated for you.
Your journey begins with a strategic conversation, conducted either online or face-to-face. We assess your clinical goals and dental history to conclude with a preliminary treatment plan and a transparent price estimate.
Once your treatment date is confirmed, our coordination team handles the complexities. We assist with itineraries, secure your stay in a premium hotel, and organize all private VIP transfers. We manage the logistics so you can focus on your health.
Upon landing, you are greeted at the airport by our dedicated representatives and seamlessly transferred to your accommodation via luxury vehicle. This is your time to rest and settle in before your clinical visit the following day.
At the clinic, full diagnostics are performed. Our specialists conduct a close, comprehensive examination to confirm, add, or adjust your preliminary treatment plan. This ensures the procedure is tailored to your exact biological needs.
We ensure the safest implant placement
3D CBCT scan provides a detailed view of the jaw, nerves, & sinuses.
It helps us precisely determine best implant position & angle.
The digital scan allows us to protect your delicate anatomy & ensure your long-term implant is a comfortable fit for you.
A stable base to support the final crown
A medical-grade implant is inserted into the jawbone.
It prevents bone density loss & forms a secure base for the crown
Made from a biocompatible medical-grade titanium, the implant is inserted under local anaesthesia to avoid pain and discomfort.
The implant fuses with your jawbone
Over 3 months, the jawbone grows and heals around the implant
it allows the implant to be a long-term replacement for the root
Most of the healing will take place under the gums and nothing will be visible. You may continue daily activities as advised by your dentist.
Connecting the implant to the final crown
A small opening is made in the gum to place the abutment on the implant.
The abutment connects the implant to the final crown.
This is a minor procedure under local anesthesia. The gum heals around the abutment in about 2 weeks.
A custom crown for natural function
A digital scan captures your smile measurements
Helps customize the crown for ultimate comfort & functionality
Your dentist will choose the best material for your crown. Manufacturing process ensures crown is fitted for bite & long-term durability.
The first 72 hours are crucial for long-term success.
Blood starts to clot as the surgical site begins to heal
Gentle care prevents pressure, irritation, and re-bleeding.
Follow your aftercare plan carefully: use the 10/10 ice method, eat soft lukewarm foods, avoid straws, spitting, & smoking as the site heals
What to expect after treatment.
Leave gauze in place and don’t remove or replace unless directed by your doctor.
If blood collects in your mouth, swallow gently. Spitting can disturb the blood clot and may cause re-bleeding.
Don’t disturb the wound with your tongue or fingers to avoid spreading infection to the treatment site.
Avoid using straws to drink any beverage as the motion can cause suction that will dislodge the clot and reinitiate bleeding.
No hot, hard, grainy or acidic foods while your sutures are healing.
Soft, lukewarm foods for 7–14 days: mashed potato, pasta, soup, strained cheese, scrambled eggs.
Avoid the implant side when chewing, even on when returning to a normal diet, until your doctor says it’s safe.
Nothing hot that could irritate the sutures. Make sure everything you consume is soft and set to room temperature or gently warmed.
Avoid rinsing your mouth for the first 24 hours. After that, you may rinse gently with saline water. You can make this by mixing 1 teaspoon of salt in a glass of water.
When brushing, completely avoid the treatment site, only brush remaining teeth. If you have dissolvable stitches, gently clean around them with a soft cotton swab
Avoid smoking and alcohol consumption completely for at least 24 hours. Both can slow down your healing process, disrupt clot formation, and lower implant success.
To reduce swelling and bruising that peak between days 1-3 post treatment, apply ice packs for 10 minutes, then remove for 10 minutes. Always wrap the ice pack in a cloth and never place it directly on your skin.
Don’t stop your antibiotic course early. Take antibiotics and painkillers exactly as instructed by your doctor.
If you’re experiencing nausea, diarrhoea, or difficulty swallowing, please contact your aftercare coordinator immediately.
From your first conversation to stepping into the clinic — every milestone of your Dentakay experience, curated for you.
Your journey begins with a strategic conversation, conducted either online or face-to-face. We assess your clinical goals and dental history to conclude with a preliminary treatment plan and a transparent price estimate.
Once your treatment date is confirmed, our coordination team handles the complexities. We assist with itineraries, secure your stay in a premium hotel, and organize all private VIP transfers. We manage the logistics so you can focus on your health.
Upon landing, you are greeted at the airport by our dedicated representatives and seamlessly transferred to your accommodation via luxury vehicle. This is your time to rest and settle in before your clinical visit the following day.
At the clinic, full diagnostics are performed. Our specialists conduct a close, comprehensive examination to confirm, add, or adjust your preliminary treatment plan. This ensures the procedure is tailored to your exact biological needs.
Understanding your needs
We perform a clinical examination to evaluate the frenulum
It allows us to determine whether a frenectomy is right for you.
Your dentist will assess your tongue & lip mobility, gum health, and any functional concerns to see if you need the procedure.
Improving movement and function
Under local anaesthesia, your doctor releases the restricted tissue.
Removing the restriction improves movement and reduces tension.
The procedure is usually quick, and your dentist will ensure you remain comfortable throughout the treatment.
Supporting proper healing
After the procedure, your dentist provides instructions for aftercare.
Following post-treatment instructions helps prevent complications.
In some cases, stretching exercises or specific movements may be part of aftercare to achieve optimal results.
What to expect after treatment.
For the first few days, choose soft foods that require minimal chewing, such as yogurt, soups, mashed foods, and smoothies.
Avoid spicy, acidic, or very hot foods that may irritate the healing area.
Drink plenty of water to stay hydrated. Do not use straws when consuming liquids.
Continue brushing your teeth as usual but be careful around the treated area to avoid irritation.
Your dentist may recommend specific rinses or saline rinses to promote healing.
If prescribed, perform tongue or stretching exercises as your dentist instructs to maintain mobility and support long-term success.
Some tenderness, swelling, or sensitivity is normal during the first few days after treatment and usually improves as healing progresses.
As movement improves, your tongue or lips may require time to adjust to the new range of motion.
If you experience excessive bleeding, worsening pain, or signs of infection during healing, contact your dentist right away.
From your first conversation to stepping into the clinic — every milestone of your Dentakay experience, curated for you.
Your journey begins with a strategic conversation, conducted either online or face-to-face. We assess your clinical goals and dental history to conclude with a preliminary treatment plan and a transparent price estimate.
Once your treatment date is confirmed, our coordination team handles the complexities. We assist with itineraries, secure your stay in a premium hotel, and organize all private VIP transfers. We manage the logistics so you can focus on your health.
Upon landing, you are greeted at the airport by our dedicated representatives and seamlessly transferred to your accommodation via luxury vehicle. This is your time to rest and settle in before your clinical visit the following day.
At the clinic, full diagnostics are performed. Our specialists conduct a close, comprehensive examination to confirm, add, or adjust your preliminary treatment plan. This ensures the procedure is tailored to your exact biological needs.
Ensuring a comfortable experience
Local anaesthesia is administered to the gums before the procedure begins.
It numbs the treatment area preventing any discomfort through the procedure.
Anaesthesia allows the procedure to be carried out painlessly. Medications may also be provided to help you further relax.
Removing overgrown gum tissue
Using a scalpel or laser, your doctor removes excess gum tissue.
It gets rid of the gum overgrowth, restoring natural gumline.
The amount of tissue removed is carefully planned to achieve a natural and desired result that preserves healthy gum tissue.
Creating a refined gum line
After removing overgrowth, the remaining gum tissue is contoured.
It ensures the gums are proportionate to the teeth to create a natural result.
Careful contouring helps improve both aesthetics and long-term gum health.
Refining the underlying support structure
In some cases, the underlying bone may be gently reshaped.
This helps support the planned gum contour and may contribute to more stable long-term results.
Through small incisions along the gum line to reshape the bone underneath. This step is only performed when necessary.
Supporting healing after surgery
Stitches may be placed to close small incisions, depending on the technique used.
When needed, stitches help control bleeding, protect the surgical area, and support the healing process.
Stitches are more commonly used in procedures done with scalpel. In laser gingivectomy, stitches may not be needed in most cases.
Protecting the treated area
A soft protective dressing is placed over the surgical site.
It shields the area during the initial healing period.
The dressing often falls out on its own. If it remains in place, your doctor will remove it during your next appointment.
What to expect after treatment.
You may experience some soreness & tenderness in the gum area for the first few days. This is normal after surgery.
Take your pain relief medications as instructed. However severe pain is not normal. Contact your doctor if pain becomes significant or unusual.
Apply an ice pack wrapped in a cloth to the swollen area. Not directly on your gum tissue, instead place it on your skin.
Stick to soft foods such as yogurt, mashed potatoes, cooked vegetables, and scrambled eggs for about one week.
Do not eat hard or crunchy foods during the early healing phase to prevent irritation.
Keep the surgical site clean and brush very gently around the area to avoid disturbing the healing tissue.
You may use an antibacterial mouthwash to help keep the area clean as instructed by your surgeon.
Continue brushing and flossing the rest of your teeth as usual, avoiding excessive pressure near the treated site.
Do not touch the surgical area with your fingers or tongue as this can interfere with healing and even increase risk of infection.
Most patients can return to work or school within 1–2 days after the procedure.
Keep physical activity light for the first few days and avoid strenuous exercise or heavy lifting for at least 48 hours.
Contact your aftercare team immediately if you experience fever, bleeding that does not stop, pus or drainage from the surgical site, or pain that does not improve with medication.
From your first conversation to stepping into the clinic — every milestone of your Dentakay experience, curated for you.
Your journey begins with a strategic conversation, conducted either online or face-to-face. We assess your clinical goals and dental history to conclude with a preliminary treatment plan and a transparent price estimate.
Once your treatment date is confirmed, our coordination team handles the complexities. We assist with itineraries, secure your stay in a premium hotel, and organize all private VIP transfers. We manage the logistics so you can focus on your health.
Upon landing, you are greeted at the airport by our dedicated representatives and seamlessly transferred to your accommodation via luxury vehicle. This is your time to rest and settle in before your clinical visit the following day.
At the clinic, full diagnostics are performed. Our specialists conduct a close, comprehensive examination to confirm, add, or adjust your preliminary treatment plan. This ensures the procedure is tailored to your exact biological needs.
We ensure the safest periodontal treatment
A full periodontal assessment with X-rays
Helps identify infection and evaluate bone loss.
Evaluation allows us to detect hidden infection below the gumline and tailor a treatment plan for your needs.
Removing bacteria below the gumline
Removing plaque, and bacteria above & below the gums
This reduces inflammation and helps the gums reattach to the teeth.
We perform scaling under local anaesthesia to thoroughly remove bacterial growth underneath the gums.
Your gums begin to heal
Gums begin to tighten and reattach around the cleaned tooth roots.
Healing reduces pocket depth and improves gum stability.
Some sensitivity is normal around this time period, but you may notice less bleeding and more comfort while eating.
Evaluating response to treatment
We evaluate the condition of your gums and the depth of the pockets.
This determines whether we need further treatment for the infection.
This stage shows how well your gums have responded and helps us prevent the infection from returning.
For deeper or persistent infection
Severe cases need minor surgery to access deeper infected areas.
It allows for regeneration in advanced gum disease cases.
If infection has progressed to deep tissue, a microsurgery allows access to the area to fully remove the infection.
What to expect after treatment.
You may experience slight bleeding when brushing or flossing may occur during the first few days after treatment.
Continue to gently brush your teeth even if the gums feel sensitive. Poor hygiene can slow healing.
Use a soft toothbrush and gently brush in circular motions to avoid irritating the gums.
Stay away from very hot, spicy, or hard foods that could irritate your gums for the first 24–48 hours.
we recommend soft foods such as yogurt, soups, pasta, and soft rice during early healing.
Try to chew on the untreated sides if discomfort is present.
Maintain oral hygiene twice daily, even if gums bleed slightly.
If prescribed, use chlorhexidine or saline rinses as directed by your doctor.
Only continue flossing if your doctor approves.
Smoking significantly slows gum healing and increases risk of re-infection.
Regular cleaning and periodontal check-ups help prevent gum disease from returning.
Tenderness or sensitivity after deep cleaning is normal and temporary.
Use over-the-counter pain medication as directed by your clinician.
Your teeth may feel more sensitive to coldness due to the root exposure, which usually improves over time.
Gum disease requires ongoing maintenance to prevent recurrence.
Professional cleaning every 3–6 months is often ideal to prevent relapse
Daily brushing, interdental cleaning, and adherence to instructions are essential for stability
From your first conversation to stepping into the clinic — every milestone of your Dentakay experience, curated for you.
Your journey begins with a strategic conversation, conducted either online or face-to-face. We assess your clinical goals and dental history to conclude with a preliminary treatment plan and a transparent price estimate.
Once your treatment date is confirmed, our coordination team handles the complexities. We assist with itineraries, secure your stay in a premium hotel, and organize all private VIP transfers. We manage the logistics so you can focus on your health.
Upon landing, you are greeted at the airport by our dedicated representatives and seamlessly transferred to your accommodation via luxury vehicle. This is your time to rest and settle in before your clinical visit the following day.
At the clinic, full diagnostics are performed. Our specialists conduct a close, comprehensive examination to confirm, add, or adjust your preliminary treatment plan. This ensures the procedure is tailored to your exact biological needs.
Planning a correction that fits your bite
We use X-rays, 3D imaging, and a clinical exam to assess your jaw.
It allows us to evaluate the misalignment and whether surgery is right for you.
Your surgeon will evaluate your jaw position, facial symmetry, and bite function to determine if surgery is right for you
Aligning your teeth before surgery
Some cases require braces or aligners for 12-18 months beforehand.
Proper alignment allows the jaws to fit together correctly after surgery.
This step gradually shifts your teeth, so they fit together properly once the jaws are repositioned. It is not needed in every case.
Mapping out your exact procedure
3D scans and computer modeling to simulate how your jaws will move.
This planning allows for a predictable surgical outcome.
To ensure you get the results you want from the procedure, we design custom surgical guides based on your jaw parameters.
Performing the correction
Under general anaesthesia, we surgically reposition the jaws.
This corrects the root cause of your bite or breathing issues.
Surgery typically takes several hours. The jaws are moved into the planned position and secured with plates and screws.
Allowing your jaw to heal
Your jaw begins healing in its new position with elastics.
Proper healing ensures that bones fuse correctly and your bite settles.
Elastics will guide your jaws as they heal. This stage involves close monitoring, and full bone healing can take up to several weeks.
Fine-tuning your new bite
Braces or aligners make final adjustments once healing is complete.
This step perfects the bite alignment and finalizes your results.
You will wear braces or aligners post-surgery for 6 to 12 months to help stabilize the jaws into their new position.
What to expect after treatment.
For the first 1–2 weeks, you may need to follow a liquid diet such as smoothies, broths, or protein shakes. Your jaw needs time before it can handle chewing.
As healing continues, gradually introduce soft foods like mashed potatoes, yoghurt, and scrambled eggs. Avoid anything that requires biting or heavy chewing.
Skip nuts, raw vegetables, and meats for several weeks. These can strain your jaw before it has healed properly.
Use a prescribed antibacterial mouth rinse or warm salt water to keep your mouth clean, especially whenbrushing is difficult at first.
Once your doctor approves, start brushing gently with a soft-bristled toothbrush, taking extra care around any surgical sites or wires.
Avoid opening your mouth too wide and support your jaw when yawning. Too much pressure can disturb healing.
Swelling and some facial numbness are normal and often improve gradually over the following weeks or months.
If you experience unusual pain, signs of infection, or your bite feels uneven as healing progresses, contact your surgeon so we can assess it.
From your first conversation to stepping into the clinic — every milestone of your Dentakay experience, curated for you.
Your journey begins with a strategic conversation, conducted either online or face-to-face. We assess your clinical goals and dental history to conclude with a preliminary treatment plan and a transparent price estimate.
Once your treatment date is confirmed, our coordination team handles the complexities. We assist with itineraries, secure your stay in a premium hotel, and organize all private VIP transfers. We manage the logistics so you can focus on your health.
Upon landing, you are greeted at the airport by our dedicated representatives and seamlessly transferred to your accommodation via luxury vehicle. This is your time to rest and settle in before your clinical visit the following day.
At the clinic, full diagnostics are performed. Our specialists conduct a close, comprehensive examination to confirm, add, or adjust your preliminary treatment plan. This ensures the procedure is tailored to your exact biological needs.
We ensure safe treatment planning
An X-ray is taken to evaluate how much the infection has spread
Helps precisely target infection sites & protect surrounding tissues.
This ensures that the infection removed and treated while healthy tissue is protected.
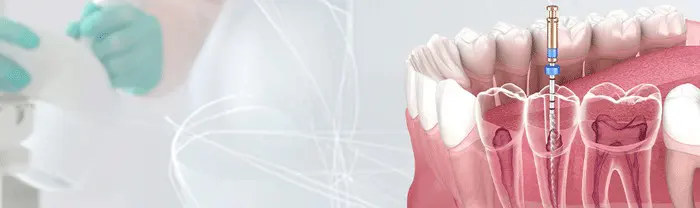
Removing infection from inside the tooth
A small opening is made in the tooth and the infected pulp is removed.
It allows the canals to be cleaned while keeping the natural tooth structure intact.
The area is numbed with local anaesthesia. A rubber dam keeps the tooth dry while tiny instruments and a disinfecting solution are used to clean the canals.
Sealing the tooth from the inside
The cleaned canals are filled and sealed with a special dental filling material.
It prevents bacteria from re-entering & protects the tooth from infection.
This material seals the tiny spaces inside the tooth roots, helping restore its structure from within.
Rebuilding the structure of the tooth
A filling or crown is placed depending on how much natural tooth structure remains.
Root-treated teeth can become brittle & restoring them prevents fracture.
Your dentist will choose the best restorative option to ensure long-term strength & function.
The first 72 hours are important for healing.
Mild soreness & sensitivity may occur in the treated area post treatment
Aftercare reduces inflammation & helps the tooth heal.
Follow your aftercare plan carefully, avoid chewing on the treated side, and take your medications as instructed.
What to expect after treatment.
You may experience some soreness & tenderness in the area for the first few days. There shouldn’t be severe pain, contact your doctor if you experience that.
Take prescribed painkillers as directed to help with discomfort.
Do not chew or apply hard pressure on the treated tooth until your doctor states otherwise.
Avoid the treated site when chewing until your doctor thinks it safe.
Avoid consuming hot or cold beverages in the first few days if you experience sensitivity.
You may brush and floss as usual but be gentle around the treated tooth.
You may use warm saltwater rinses after the first 24 hours to keep the area clean.
Avoid smoking as it can slow healing rate and increase the risk of complications.
If you experience severe pain & discomfort or a bite that feels uncomfortable, contact your aftercare team right away.
From your first conversation to stepping into the clinic — every milestone of your Dentakay experience, curated for you.
Your journey begins with a strategic conversation, conducted either online or face-to-face. We assess your clinical goals and dental history to conclude with a preliminary treatment plan and a transparent price estimate.
Once your treatment date is confirmed, our coordination team handles the complexities. We assist with itineraries, secure your stay in a premium hotel, and organize all private VIP transfers. We manage the logistics so you can focus on your health.
Upon landing, you are greeted at the airport by our dedicated representatives and seamlessly transferred to your accommodation via luxury vehicle. This is your time to rest and settle in before your clinical visit the following day.
At the clinic, full diagnostics are performed. Our specialists conduct a close, comprehensive examination to confirm, add, or adjust your preliminary treatment plan. This ensures the procedure is tailored to your exact biological needs.
Understanding your anatomy
We take a 3D CBCT scan of the upper jaw.
It helps us understand if you need a sinus lift.
We evaluate bone density, sinus position, and overall anatomy of the upper jaw to ensure ideal implant support.
Building the foundation for future implants
Under local anaesthesia, your doctor creates a small opening to access the bone beneath the sinus.
This allows your doctor to gently lift the sinus membrane and place the bone graft material.
Depending on your case, your doctor could use either a lateral window technique or a crestal approach.
Your body builds new bone
The graft material gradually integrates with your natural bone.
This phase creates enough bone volume to support dental implants.
The process happens within 3 to 6 months. There will be no visible changes in the mouth after the initial healing.
What to expect after treatment.
Light bleeding or nasal spotting may occur initially. Avoid blowing your nose for 14 days and sneeze with your mouth open to reduce pressure.
Avoid touching the surgical site with your tongue or fingers. This can cause bleeding or spread infection.
Stick to soft, cool, or lukewarm foods for the first few days.
Do not drink through straws, since the action of suction can disrupt healing.
Heat can increase swelling and discomfort in early healing.
You may use saline rinse after the first 24 hours or the mouth wash your doctor recommends.
Avoid the surgical area when brushing your teeth.
These significantly delay healing and increase risks of failure or infection.
Swelling after a sinus lift typically peaks within 48–72 hours and then gradually improves.
Apply ice packs, but not directly on the surgical site. Wrap it in a cloth and place in on your skin. Do the 10 minutes on/10 minutes off technique during the first 24–48 hours.
Take antibiotics and pain relief exactly as instructed by your doctor.
From your first conversation to stepping into the clinic — every milestone of your Dentakay experience, curated for you.
Your journey begins with a strategic conversation, conducted either online or face-to-face. We assess your clinical goals and dental history to conclude with a preliminary treatment plan and a transparent price estimate.
Once your treatment date is confirmed, our coordination team handles the complexities. We assist with itineraries, secure your stay in a premium hotel, and organize all private VIP transfers. We manage the logistics so you can focus on your health.
Upon landing, you are greeted at the airport by our dedicated representatives and seamlessly transferred to your accommodation via luxury vehicle. This is your time to rest and settle in before your clinical visit the following day.
At the clinic, full diagnostics are performed. Our specialists conduct a close, comprehensive examination to confirm, add, or adjust your preliminary treatment plan. This ensures the procedure is tailored to your exact biological needs.
Assessing your gums and teeth
Your dentist examines your teeth, checking for plaque buildup, tartar, or signs of inflammation.
If a dental problem is present, it may not be ideal to proceed with the cleaning.
Using a mirror, your dentist will examine your mouth, making sure your gums and teeth are in good shape for the procedure.
Deep cleaning the teeth and gumline
Plaque and tartar are removed from the teeth and around the gumline.
Removing tartar is essential for preventing gum disease and inflammation.
Tartar cannot be removed at home, and removing it helps maintain good oral health and prevent inflammation and bad breath.
Polishing the surface
The teeth are polished using an electric brush with a special polishing paste.
Polishing removes surface stains and smooths the enamel.
The special toothbrush helps smooth the tooth surface, making it harder for plaque to accumulate again.
Strengthening the enamel
Your mouth is rinsed and foamy gel with fluoride varnish is applied to your teeth.
Fluoride varnish helps protect your teeth from cavities.
Your dentist will leave the paste on for a few minutes before rinsing thoroughly. Don’t eat or drink 30 mins post treatment.
What to expect after treatment.
You may feel slight gum tenderness or sensitivity for the first 1–2 days. This is normal after cleaning and should settle quickly on its own.
There should be no significant pain. If you experience strong or worsening pain, contact your dentist immediately.
Avoid coffee, tea, cola, red sauces, and heavily pigmented foods for the first 24 hours.
You can eat as usual otherwise, with no major restrictions.
If your teeth feel sensitive, avoid very hot or very cold drinks for a short period.
You can brush and floss as usual but be gentle if your gums feel tender. Use a soft toothbrush if needed.
Rinse with warm saltwater once or twice daily if your gums feel irritated, especially within the first 2 days.
Avoid smoking for at least the first day since it irritates your gums.
From your first conversation to stepping into the clinic — every milestone of your Dentakay experience, curated for you.
Your journey begins with a strategic conversation, conducted either online or face-to-face. We assess your clinical goals and dental history to conclude with a preliminary treatment plan and a transparent price estimate.
Once your treatment date is confirmed, our coordination team handles the complexities. We assist with itineraries, secure your stay in a premium hotel, and organize all private VIP transfers. We manage the logistics so you can focus on your health.
Upon landing, you are greeted at the airport by our dedicated representatives and seamlessly transferred to your accommodation via luxury vehicle. This is your time to rest and settle in before your clinical visit the following day.
At the clinic, full diagnostics are performed. Our specialists conduct a close, comprehensive examination to confirm, add, or adjust your preliminary treatment plan. This ensures the procedure is tailored to your exact biological needs.
Evaluating your oral health
Your dentist examines your teeth and gums and discusses your smile expectations and goals
Assessments ensures your teeth and gums are healthy enough to handle the whitening process
Evaluation helps determine the most suitable whitening approach for you & help us understand how your teeth may respond to treatment.
Preparing your teeth for whitening
Your teeth are cleaned & protective barriers are placed over your gums & soft tissues.
This ensures whitening gels are only in contact with the designated areas for treatment
Cleaning is done beforehand if necessary & special protective materials ensure whitening gel doesn’t irritate your gum & surrounding tissue
Safely brightening your smile
A professional whitening gel is carefully applied to the surface of your teeth.
The whitening agent enters the enamel and breaks down stain molecules
The gel is evenly distributed across the teeth to ensure whitening results are consistent on all teeth.
Enhancing the whitening process
A blue LED or UV lamp is used to activate the compounds in the whitening gel
This accelerates the process of the gel penetrating the enamel and breaking down stains
Blue LED light is directed at the teeth for a certain period of time while your dentist monitors the progress throughout
Checking your whitening results
The whitening gel is removed, and the new tooth shade is evaluated.
Your dentist evaluates how well your teeth responded to treatment and if the results are ideal
If it’s safe, your dentist may perform additional whitening cycles during the same appointment.
Maintaining your whitening results
Your dentist provides aftercare instructions for maintaining your results.
Proper care helps maintain the results and help you reduce and handle temporary sensitivity.
A dedicated team will follow up with you and provide guidance on maintaining your new smile, including dietary recommendations
What to expect after treatment.
It is normal to experience some tooth sensitivity for the first 24–72 hours after whitening. This is noticeable when consuming hot, cold, sweet, or acidic foods and drinks.
Use a sensitivity toothpaste as recommended by your dentist. If needed, take pain relief medications as instructed by your doctor.
Newly whitened teeth are more susceptible to staining during the first 2 days. Choose light-coloured foods and avoid coffee, tea, wine, cola, curry, chocolate, soy sauce, dark-coloured fruits, and similar staining foods or drinks.
Don’t consume hot or cold beverages and foods during the first few days if sensitivity is present.
Citrus fruits, lemons, oranges, pickles, and other acidic products may increase sensitivity and should be avoided during the first 48 hours.
Smoking, vaping, and other tobacco products can quickly stain newly whitened teeth and undo the results
Maintain good oral hygiene by brushing twice daily and flossing.
Refrain from using strongly coloured mouthwashes or toothpastes during the first 48 hours following treatment.
After the initial recovery period, if you consume staining foods or beverages, rinse your mouth with water afterward and brush when appropriate.
Routine examinations and professional cleanings help maintain a bright, healthy smile.
If you experience severe sensitivity, significant gum irritation, or discomfort that persists beyond a few days, contact your dental team for advice.
From your first conversation to stepping into the clinic — every milestone of your Dentakay experience, curated for you.
Your journey begins with a strategic conversation, conducted either online or face-to-face. We assess your clinical goals and dental history to conclude with a preliminary treatment plan and a transparent price estimate.
Once your treatment date is confirmed, our coordination team handles the complexities. We assist with itineraries, secure your stay in a premium hotel, and organize all private VIP transfers. We manage the logistics so you can focus on your health.
Upon landing, you are greeted at the airport by our dedicated representatives and seamlessly transferred to your accommodation via luxury vehicle. This is your time to rest and settle in before your clinical visit the following day.
At the clinic, full diagnostics are performed. Our specialists conduct a close, comprehensive examination to confirm, add, or adjust your preliminary treatment plan. This ensures the procedure is tailored to your exact biological needs.
Planning for a safe extraction
X-rays and a clinical examination assess your tooth & oral health.
To see if an extraction or wisdom tooth removal is appropriate.
Your dentist will evaluate nearby nerves, surrounding bone, and any signs of infection before starting treatment.
Ensuring your comfort during treatment
We numb the treatment area with local anaesthesia
For your doctor to extract teeth without causing your pain
You may feel pressure, but no pain. For more complex cases, your doctor may consider other sedation approaches
Carefully removing the target tooth
The dentist gently loosens and removes the tooth.
Removing the tooth eliminates the source of pain & infection
For complicated cases of wisdom teeth, your doctor will make a small incision and remove the tooth in sections.
Supporting proper healing
Your doctor cleans the area & places a gauze and might stitch the area.
Helps prevent bleeding and support a blood clot in the site.
The stitches in most cases are dissolvable. Your dentist will provide you with aftercare instructions before you leave the clinic.
What to expect after treatment.
apply gentle pressure on the gauze to help a stable blood clot form and prevent bleeding.
Avoid rinsing, spitting, or drinking through a straw for the first 24 hours. The behaviours can dislodge the clot and delay healing.
Slight bleeding during the first day is normal. However, if you experience heavy bleeding, contact your dentist right away.
Avoid eating until the local anaesthesia completely wears off. Otherwise, you may accidentally bite and hurt your lips, cheeks, or tongue.
Eat soft, cool foods such as yoghurt, mashed potatoes, soup (lukewarm), or smoothies spoon during the first 24 hours.
Continue brushing your teeth as normal. However, you should avoid brushing directly over the extraction site during the first day. This can irritate the area and cause bleeding.
After the first 24 hours, gently rinse with warm salt water or the mouthwash your doctor prescribes several as many times a day as your doctor instructs.
Smoking and alcohol can delay healing and significantly increase the risk of complications like a dry socket.
Apply an ice pack to the outside of your cheek for 10 minutes at a time during the first 24 hours to help reduce swelling.
Use any medications that your doctor prescribed exactly according to the instructions.
Contact your dentist if you experience severe pain, fever, heavy bleeding, or signs of infection. These symptoms may require prompt assessment.
From your first conversation to stepping into the clinic — every milestone of your Dentakay experience, curated for you.
Your journey begins with a strategic conversation, conducted either online or face-to-face. We assess your clinical goals and dental history to conclude with a preliminary treatment plan and a transparent price estimate.
Once your treatment date is confirmed, our coordination team handles the complexities. We assist with itineraries, secure your stay in a premium hotel, and organize all private VIP transfers. We manage the logistics so you can focus on your health.
Upon landing, you are greeted at the airport by our dedicated representatives and seamlessly transferred to your accommodation via luxury vehicle. This is your time to rest and settle in before your clinical visit the following day.
At the clinic, full diagnostics are performed. Our specialists conduct a close, comprehensive examination to confirm, add, or adjust your preliminary treatment plan. This ensures the procedure is tailored to your exact biological needs.
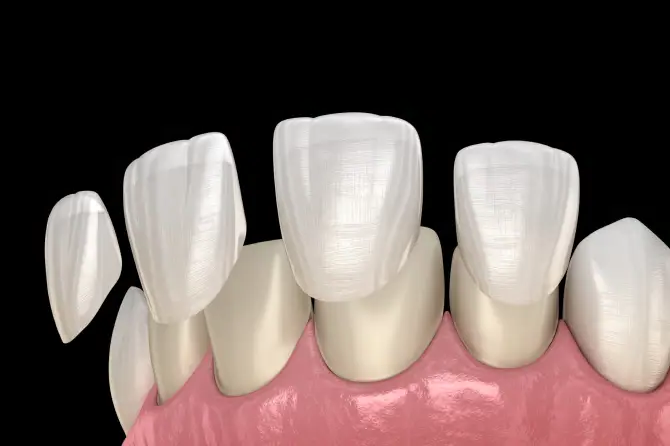
Choosing the right treatment for your smile
A clinical examination and digital scans assess your teeth, bite, and oral health.
This helps us decide whether bonding or veneers are more suitable for you.
Your dentist will assess the condition, shape, and colour of your teeth and discuss the result you want to achieve.
Preparing your teeth for treatment
Your teeth are cleaned and gently prepared for the chosen treatment.
Proper preparation helps the bonding or veneers fit and stay securely in place.
Bonding usually requires little or no enamel removal. For veneers, a thin layer of enamel may be removed to create enough space.
Designing a natural-looking result
The shape, size, and colour of the restoration are planned to match your smile.
This helps the treated teeth blend naturally with the surrounding teeth.
For bonding, the resin colour is selected before it is shaped directly on the tooth. For veneers, digital scans are used to design the porcelain shells.
Creating your new smile
The bonding resin or porcelain veneers are carefully placed on the teeth.
Accurate placement helps create a secure fit and natural appearance.
Bonding resin is applied, shaped, and hardened in layers. Veneers are checked for fit and colour before being permanently bonded.
Completing your treatment
Your dentist polishes the restorations and checks your bite.
Final adjustments help the treated teeth feel comfortable and work properly.
Any small refinements are made so the bonding or veneers blend naturally with your smile.
What to expect after dental bonding or porcelain veneer treatment.
For the first 48 hours, limit coffee, tea, red wine, and strongly pigmented foods. This is especially important for composite bonding, which can absorb stains more easily than porcelain or natural enamel.
Avoid biting directly into very hard foods such as ice, hard sweets, and nuts. Excessive pressure can chip or damage bonding and porcelain veneers.
Limit sticky foods such as caramel or chewing gum, especially immediately after treatment. These foods can place unnecessary stress on bonded restorations.
Continue brushing twice daily using a soft-bristled toothbrush. Good oral hygiene helps maintain the appearance and longevity of your bonding or veneers.
Floss daily by gently guiding the floss between your teeth. Take care around the edges of the bonding or veneers.
Routine dental check-ups and professional cleanings help protect your teeth and keep your bonding or veneers in good condition.
Your treated teeth may feel slightly different at first, but you should gradually adjust to your bonding or veneers.
If your bite feels uneven or you notice discomfort, damage, or movement in your bonding or veneers, contact your dentist for an evaluation.
From your first conversation to stepping into the clinic — every milestone of your Dentakay experience, curated for you.
Your journey begins with a strategic conversation, conducted either online or face-to-face. We assess your clinical goals and dental history to conclude with a preliminary treatment plan and a transparent price estimate.
Once your treatment date is confirmed, our coordination team handles the complexities. We assist with itineraries, secure your stay in a premium hotel, and organize all private VIP transfers. We manage the logistics so you can focus on your health.
Upon landing, you are greeted at the airport by our dedicated representatives and seamlessly transferred to your accommodation via luxury vehicle. This is your time to rest and settle in before your clinical visit the following day.
At the clinic, full diagnostics are performed. Our specialists conduct a close, comprehensive examination to confirm, add, or adjust your preliminary treatment plan. This ensures the procedure is tailored to your exact biological needs.
Planning your new smile with precision
We conduct CBCT scans and a thorough oral examination
To evaluate your bone structure and overall oral health.
Your surgeon will assess your upper jaw, bone density, sinus region, and overall health to develop a treatment plan.
Preparing for a painless procedure
Your doctor administers local anaesthesia or general anaesthesia.
Proper preparation ensures your comfort.
This stage allows the surgical team to begin treatment without causing any discomfort to you.
Anchoring the implants
Your doctor secures the zygomatic implants into the cheekbone.
Cheekbones provide stability when the jaw has insufficient bone.
Your doctor secures the implants using advanced surgical planning to maximize stability and long-term success.
Restoring your smile immediately
Your doctor attaches a temporary bridge after implant placement.
It allows patients to leave with functional teeth in the same day
Not every patient is suitable for immediate loading. Your doctor will choose the safest approach for you based on your case.
Completing your new smile
Your temporary bridge is replaced with a permanent prosthesis.
The restoration is ideal for long-term comfort, function, and aesthetics.
Once healing is complete, you’ll receive your custom prosthesis. Your dentist will make any necessary adjustments for comfort.
What to expect after treatment.
Follow a soft-food diet during the initial healing period. This avoids placing excessive pressure on the implants and delaying healing.
Nuts, hard bread, ice, and similar foods are not safe to consume during this period. Avoid them until your dentist confirms you can consume them safely.
Gently clean your mouth according to instructions by your dentist. Basic hygiene reduces the risk of infection.
If your doctor prescribes a special kind of mouthwash, use it as instructed to support healing.
Smoking significantly increases the risk of implant complications and can delay healing.
Swelling, bruising, and minor discomfort are common during the first few days and usually improve gradually.
If you experience severe pain, excessive bleeding, or anything that alarms you, contact your dentist immediately.
A detailed patient guide for this treatment is currently being prepared. Please check back soon or contact our team for personalised support.


